Check out the new tutorial.
Getting started
Make sure Contact Form 7 and Conditional Fields for Contact Form 7 are both installed on your WordPress site.
In your WordPress admin, go to Contact > Add New to create a new form.
I will use the form below as an example for this entire article. Obviously you can create your own form.
Here’s the code:
<fieldset>
<legend>Basic Fields</legend>

Your name
[text name]

Your email
[text email]
</fieldset>

<fieldset>
<legend>Advanced Fields</legend>

Your operating system
[select pick-os "Windows" "Mac" "Linux" "Android" "iOS" "Other"]

Some advanced field
[text adv]
</fieldset>
Add conditional logic to your form
Now let’s create a drop down list to select which fieldset to show, and add a text-field if a user picks Other from the Operating System select box.
At the top of the form we will add a drop down list to select which field sets should be shown.
Which fields would you like to view? [select pick-fields "Basic fields" "Advanced fields" "All fields"]
Create field groups
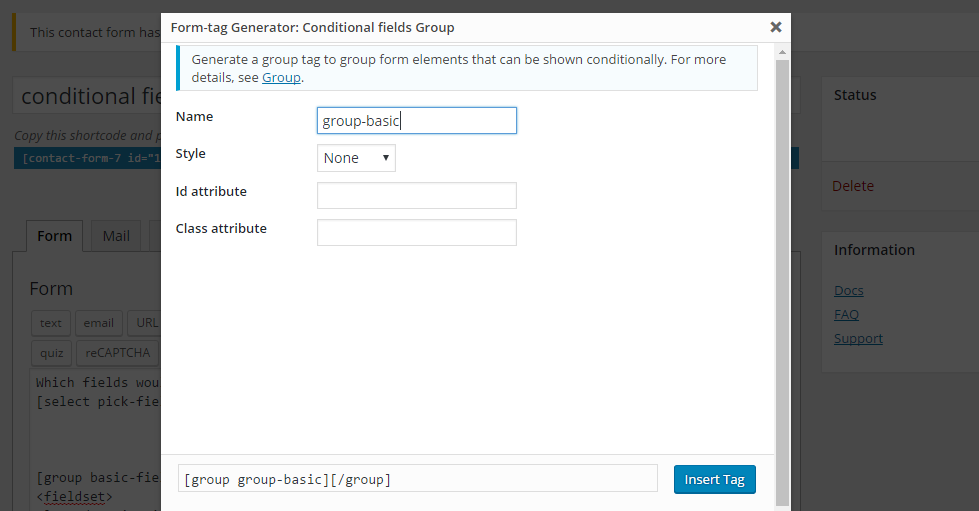
You will notice a new Contact form 7 tag called Conditional fields Group.

After you click this a popup will appear where you can choose a name.

Click Insert tag to insert the group.
To put a part of the form that you would like to be able to show and hide based on some conditions, you will need to wrap it between these group tags, like so:
[group basic-fields]

<fieldset>
<legend>Basic Fields</legend>

Your name
[text name]

Your email
[text email]
</fieldset>

[/group]
Note that groups can also be nested. So for example, it’s possible to create a group around the Advanced fieldset, and add another group inside it that can be triggered based on the OS choice.
[group advanced-fields]

<fieldset>
<legend>Advanced Fields</legend>

Your operating system
[select pick-os "Windows" "Mac" "Linux" "Android" "iOS" "Other"]
[group other][text other_os][/group]

Some advanced fields
[text adv]
</fieldset>

[/group]
Creating conditions
After saving the form, we can move to the Conditional Fields tab to create the conditions.

Click the Add new conditional rule link. In order to show basic form when the user picks “Basic form” in the dropdown list, add the folowing rule:
![]()
The other conditions can be added in the same manner.
In order to display multiple groups with only one field, you can add multiple lines. In our example if someone selects to show All fields, it would need to display both field groups. we can achieve this by adding these two rules:
- if pick-fields equals All fields then show basic-fields
- if pick-fields equals All fields then show advanced-fields
Putting it all together
If you have added all conditions, it should look something like this:

The full form code:
Which fields would you like to view? [select pick-fields "Basic fields" "Advanced fields" "All fields"]

[group basic-fields]
<fieldset>
<legend>Basic Fields</legend>

Your name
[text name]

Your email
[text email]
</fieldset>

[/group]
[group advanced-fields]

<fieldset>
<legend>Advanced Fields</legend>

Your operating system
[select pick-os "Windows" "Mac" "Linux" "Android" "iOS" "Other"]
[group other][text other_os][/group]

Some advanced fields
[text adv]
</fieldset>

[/group]
And here is the final result:
Extra: Customizing the email message
Since version 0.2 of the plugin it is possible to generate the email message based on which groups were visible. To do this you can simply wrap parts of the email body with [group-name] … [/group-name] tags.
Let’s look at these 2 scenario’s, for example
Scenario 1
Let’s say the user filled in the form like this:

And the email message we would like to get is:
Dear Admin,
Someone filled out the Advanced fields on your site. The person is using Linux as an OS and he says: “i’m so advanced.”
Cheers!
Scenario 2
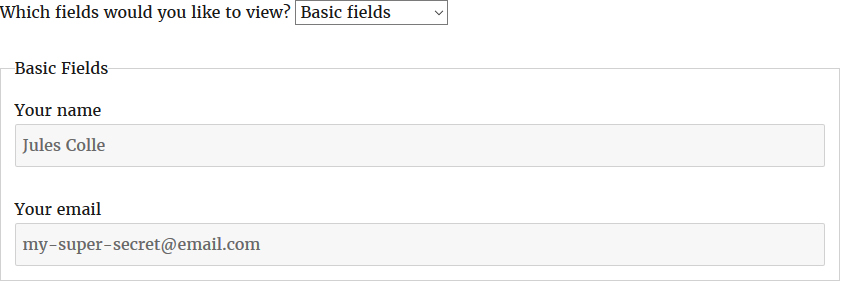
Let’s say the user filled in the form like this:

And the email message we would like to get is:
Dear Admin,
Someone filled out the Basic fields on your site. The person’s name is Jules Colle and his email address is my-super-secret@email.com
Cheers!
The Mail Message Body
The desired scenario’s can be met by entering the following text in the Message body in the contact form 7 Mail tab
Dear Admin,

[basic-fields]
Someone filled out the Basic fields on your site.
The person's name is [name] and his email address is [email]
[/basic-fields]

[advanced-fields]
Someone filled out the Advanced fields on your site.
The person is using [pick-os] as an OS and he says: "[adv]"
[/advanced-fields]

Cheers!